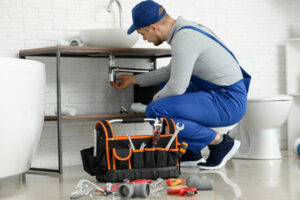
Plumbing involves the installation, repair, and maintenance of pipes, fixtures, appliances, and other equipment for water distribution in residential, commercial, and industrial settings. Its physically demanding work requires attention to detail and skill in dealing with confined spaces.
To help attract customers, focus on developing your website and other marketing strategies. Also consider establishing membership plans to check in with customers regularly and offer annual services that benefit them. Click https://www.plumbing-express.com/ to learn more.
Plumbing compression fittings, commonly used in toilet stop valves and connections for hot and cold water faucets, keep pipes, fixtures and appliances secure and leak-free. These fittings are simple to install and require no soldering or heat. These advantages make them popular for DIY plumbing projects, including those in tight spaces where a traditional soldering joint would be difficult to reach or impossible to create.
A basic compression fitting consists of three components: the nut, the ring and the seat. The nut is threaded and screwed onto the seat, which is usually part of a fixture like a valve. Once the nut is tightened, it compresses the ring over the pipe or tube, creating a seal that prevents fluid from seeping through the connection. The ring is often made from the same material as the nut to ensure compatibility and durability.
In addition to proper sizing and installation, the success of a compression fit depends on other factors including hose or pipe selection, the fitting and ferrule design and the tubing or pipe material itself. For instance, using a metal-to-metal connection (like steel to copper) can lead to corrosion, whereas a plastic-to-metal connection is less likely to produce such issues.
Before installing a compression fitting, you must cut the tubing or pipe to the correct length. Use a tube cutter, which is easier and more precise than a hacksaw. You should also use a deburring tool to remove any burrs that could compromise the seal. Once you have your pipes and tubes ready to go, start by hand-tightening the nut to ensure that the components are properly aligned. Then, use a wrench to tighten the nut further, typically one and a half turns. Make sure not to over-tighten, which can damage the ferrule and cause leaks.
Welding or Soldering
The plumbing industry relies heavily on a method called soldering to make leak-free connections in copper pipes. This process involves using high heat to melt a filler metal called “solder” onto the end of the pipe and fitting. Then, the plumber applies a special paste known as flux to the inside of the joint. This helps to clean the area and allow the melted solder to flow properly. Plumbers also use a special soldering iron with a variable temperature to control the amount of heat that is applied to the pipe and fitting.
The main difference between welding and soldering is that welding uses significantly higher temperatures than soldering. This allows it to create stronger, more durable connections that can withstand greater amounts of mechanical stress. Welding is commonly used for heavy-duty applications in industries like automotive, construction, and aerospace. Meanwhile, soldering finds its niche in applications like electronics manufacturing and jewelry making where precision and delicacy are paramount.
When it comes to plumbing, soldering is typically used to join pipes that carry potable water. This is because the pipes must be able to stand up to the rigorous demands of drinking water. To ensure a strong, durable connection, plumbers often use a special type of lead-free solder that is labeled for plumbing. Using this type of solder ensures that the joints will not leak or burst under pressure.
Aside from the type of solder, other factors influence the quality of the final connection. Before soldering, a plumber should thoroughly clean the pipe and fitting with a wire brush or emery cloth to remove any dirt or corrosion that could hinder the soldering process. Once the plumber has cleaned the pipe and fitting, they will apply a layer of flux to the surface before heating them with the soldering iron.
Once the pipes and fittings are ready for soldering, they will be heated by the plumber’s soldering iron at a variable temperature to melt the filler metal. Once the solder has melted, the plumber will apply it to the joint between the copper pipe and fitting. Once the solder has cooled, it will provide a strong, watertight, and durable connection between the pipes.
Brazing
Typically, plumbers utilize brazing when they need high-strength connections capable of enduring a range of temperature and pressure conditions. In general, the strength of a brazed connection far exceeds that of a soldered joint. Brazing also allows the use of a wider variety of metals and alloys than can be joined through soldering.
Unlike welding, in which both the base metals and the filler material melt, with brazing only the filler metal melts. This is a benefit for applications where different types of metal are being joined together, as it is easier to control the melting point of the filler than it is to do with welding.
Before attempting to braze, it’s important to prepare the pipe and fitting for the process. First, the plumber needs to clean the surface of both the tube and the flange base. Deburring is also an important step to remove any sharp edges that might interfere with the fusion of the copper. Once the pipes are cleaned, the plumber applies a layer of flux to both the inside and outside surfaces of the joints. The plumber then ignites an acetylene torch and heats the tube and the flange-base of the fitting until they reach the temperature at which the flux bubbles and turns completely fluid.
When the molten flux passes through the joint, it fills in gaps between the tubes or other components and creates a strong bond. This also helps protect the joints from corrosion and vibration. Plumbers can use either a torch or a hand-held brazing rod to conduct the brazing process. A hand-held torch is more portable than a welding unit and offers more control over the heating of the tube and the flange-base. Once the tube and flange-base are heated to the appropriate temperature, the plumber inserts the brazing rod into the joint.
There are a number of different types of brazed joints, including butt and lap joints. The lap joint doubles the thickness of the joining part at the joint and provides greater tensile strength. It’s also essential to provide a vent during the brazing process, as this ensures that expanding air and gases do not become trapped in the joint, which could cause leaks.
Threading
Pipe threads may be small in size, but they play a vital role in plumbing systems. Understanding how they function can help professionals and DIYers alike achieve reliable, leak-free connections and long-lasting systems. Learn about the various types of threads, standards, and sealing techniques to prevent costly mistakes that could damage your plumbing.
Many of the threads on bolts and screws are parallel-sided, but those used for pipes are tapered. This creates a more precise seal between the threads and can hold greater pressure than straight-sided threads. Creating tapered threads requires more precision and quality control than machining or rolling straight-sided threads, so it is best left to trained professionals.
To make a proper seal, the male thread of a pipe must match the female tapered thread of the fitting. This is achieved through a combination of the threads’ form, the use of jointing compound to fill any voids between them, and the application of Teflon tape or pipe dope to provide a seal between them. The positive seal of a threaded connection depends on many variables, including the installation torque; system operating pressures; the specific gravity and viscosity of the system media; component material; and the cleanliness of the threads and pipe dope.
While threading is a complex process, it can be simplified with the right tools and preparation. A ratcheting pipe threader, available in a variety of sizes to fit different pipe diameters, makes the job much easier. Before starting the process, measure the pipe and mark it with a stick ruler or marker. Prepare the pipe by removing any dirt or debris with a hand tool, and clean the pipe and threads using a reamer or drill bit. Always wear protective eyewear and work gloves when using these tools.
Some threaded pipe joints are known as dry fits because they don’t require a sealant. This is typically done when a tight seal is necessary but the presence of the sealant might interfere with the operation of the system or be detrimental to the environment, such as with oxygen services. A tapered thread can be a dry fit as well, but extreme care must be taken to avoid overtightening.